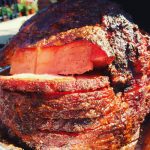
Category Archives: Pork

Fallin of the bone baby back pork ribs recipe

Baby Back Pork Ribs

Baby Back Pork Ribs

Indulge in the ultimate BBQ experience with SuckleBusters' mouthwatering baby back pork ribs recipe. Our step-by-step guide ensures tender, flavorful ribs that fall off the bone. Elevate your grilling game today!
Prep Time30 minutes
Cook Time3 hours
Course: Main Course
Cuisine: BBQ
Keyword: babay back pork ribs, bbq ribs, falling of the bone, loin back ribs, pork
Servings: 6

Equipment

  • 1 Smoker or Grill
  • 1 Aluminum Foil

Ingredients

Instructions

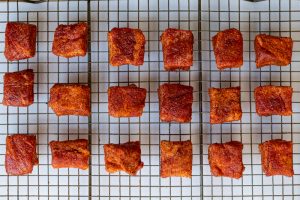
Step 1 – Prep and Initial Cook – 2 hours

  • Preheat Smoker or Grill to 300 degrees cooking temperature
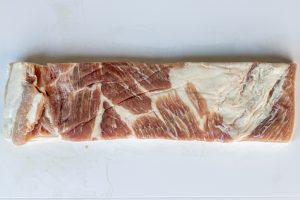
  • Rinse and pat dry ribs
  • Remove the silver skin (if applicable)
    Prepare baby back pork ribs by removing the silver skin
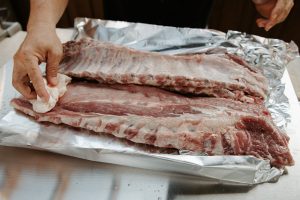
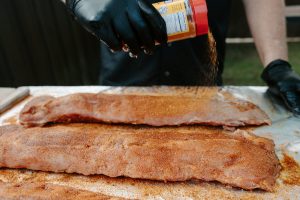
  • Evenly season both sides of the ribs with Hog Waller
    Seasoning the baby back pork ribs
  • Place the ribs on the smoker – meat side up, uncovered
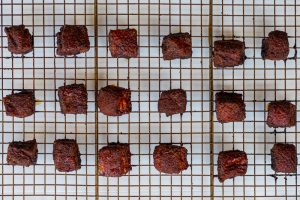
  • Set timer and cook the ribs for 2 hours

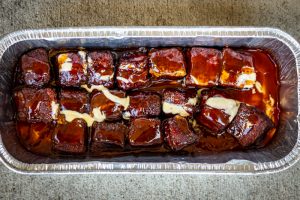
Step 2 – Glaze, Wrap and Cook – 45 minutes

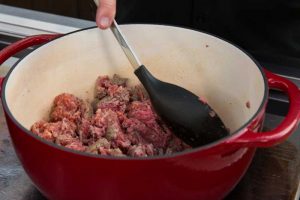
  • Add 8 oz Honey BBQ Glaze + 1 stick of butter to a small pot
  • Incorporate and simmer on low for 10 minutes
  • Remove ribs from the smoker
  • Glaze both sides
    Glazing the baby back pork ribs
  • Apply sugar Daddy BBQ Rub to both sides
  • Wrap in foil
  • Place back on the smoker
  • Set timer and cook for 45 minutes

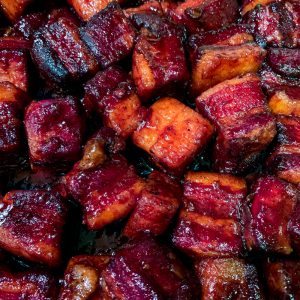
Step 3 – Unwrap, Glaze and Finish Ribs – 15 minutes

  • Remove ribs from Smoker
    Remove the ribs from the smoker
  • Unwrap
  • Apply thin layer of BBQ Glaze and Sugar Daddy
  • Place back on the Smoker
  • Set timer for 15 minutes
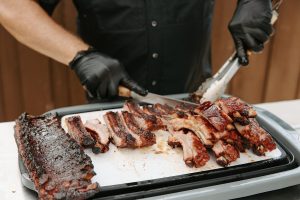
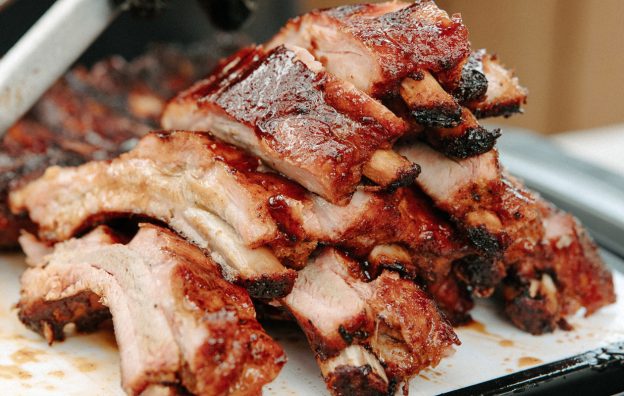
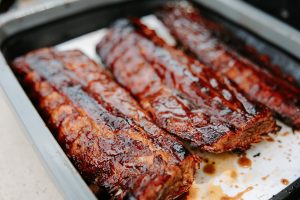
Serve and Enjoy!

  • Remove ribs from the Smoker
  • Hold for about 5 minutes
  • Slice, Serve and ENJOY!
    Slicing the baby back pork ribs

Video

BBQ Pork Belly Burnt Ends

Pork Belly Burnt Ends

Pork Belly Burnt Ends

Get in MY belly! This smoked-pork, burnt ends recipe is a winner.
Prep Time30 minutes
Cook Time3 hours 30 minutes
Resting Time15 minutes
Total Time4 hours 15 minutes
Course: Appetizer, Main Course
Cuisine: BBQ, Pork
Keyword: BBQ, burnt ends, pork belly, pork butt
Servings: 4 people
Cost: $25

Equipment

  • Smoker or Grill

Ingredients

  • 3 Lbs Skin-off pork belly approximate
  • 3 tbsp olive oil
  • 4 tbsp SuckleBusters Hog Waller
  • 2 tbsp SuckleBusters SPG
  • 2 tbsp SuckleBusters Texas Pecan
  • 2 tbsp Honey
  • 2 tbsp Butter
  • 1/2 cup SuckleBusters Original BBQ Sauce
  • 1/4 cup SuckleBusters Honey BBQ Glaze

Instructions

Preparation

  • Remove pork belly from packaging and pat dry with a paper towel
    Raw pork belly
  • Once dry, cut the pork into 1.5-inch cubes
  • Apply the olive oil, cover thoroughly
  • Dust with a light layer of SPG, coating all sides
  • Next, apply a thick layer of Hog Waller, covering the pork completely
  • Finish with a light coating of Texas Pecan Rub
  • Place the cubes to an oiled jerky rack (or cooling rack)
    Seasoned pork belly

Cooking

  • Preheat your smoker or grill to 250 – 275 degrees cooking temperature
  • Once your smoker is up to temp, put your pork belly on the smoker (on the rack) and close the lid
    Cooked pork belly burnt ends
  • After two hours, check to see that bark or “crust” starting to develop, and they should have a dark mahogany “burnt” look to them. If, after two hours, they don’t have the color, continue cooking, checking every 1/2 hour until the color is correct or the internal temp measures 165º
  • Remove the burnt ends from the smoker, place in an aluminum pan
  • Combine 2 TBSP melted/soft butter, 2 TBSP honey, and 1/2 cup of SuckleBusters Original BBQ Sauce. Add to the pork, covering all pieces.
    Sauced pork belly burnt ends
  • Cover the pan with foil and place it back on the smoker at 250-275º, cook for 1 hour
  • After 1 hour, check for tenderness. When done, the burnt ends should almost fall apart when probed. The final internal temp will be somewhere between 190-203º
  • Add 1/4 cup of SuckleBusters Honey BBQ Glaze and toss the burnt ends, covering completely
  • Continue cooking for 10-15 minutes longer to allow the sauce set. Remove from the smoker and rest for 10 minutes. The meat will have a beautiful glaze and shine

Rest and then Serve

  • Remove from the heat and allow the burnt ends to rest for about 15 minutes.
    Finished pork belly burnt ends
  • Serve and enjoy!
Pulled Pork Sandwiches

Hot & Fast – Pulled Pork Sandwiches

Pulled Pork Sandwiches
Print
5 from 1 vote

Hot & Fast Pork Butt – Pulled Pork Sandwiches

What makes this recipe hot and fast is the fact we’re cooking at 300°. The main benefit of cooking hot and fast is a shorter cook time. Instead of tending to a smoker for 12+ hours, you’re only looking at about 6-8 hours. So if you’re in a time crunch, but want some great bbq, hot and fast is the way to go!
Prep Time30 minutes
Active Time6 hours
Resting time1 hour
Total Time9 hours 30 minutes
Course: Main Course
Cuisine: BBQ, Pork
Keyword: pork butt, pulled pork, Pulled Pork Sandwiches
Yield: 12 sandwiches
Cost: $20

Equipment

  • BBQ grill or smoker
  • Aluminum Foil Pan
  • Spray bottle
  • Foil
  • Meat thermometer

Materials

  • 6 – 10 lb Pork butt
  • 12 each Buns Brioche recommended
  • 1 each SuckleBusters Honey BBQ Rub
  • 1 each Tailgaters Party Rub
  • 1 cup Apple juice

Instructions

Prepare the Pork Butt

  • Trim any hard fat on the pork butt, and trim any loose pieces of meat left on from the butcher
    Seasoned Pork Butt
  • Optional: Smother the pork butt in thin layer of prepared mustard
  • Season the pork butt completely with a medium coating of Tailgater’s Party Rub
  • Add a heavy top layer of SuckleBuster’s Honey BBQ Rub

Smoke the Pork Butt – setting the Bark

  • Set the smoker cooking temperature to 300 degrees
    Spritzing the Pork Butt
  • Place the seasoned pork but on the smoker
  • Spritz every 1 hour with apple juice
  • Cook to an internal temperature of 165ºF, about 3 to 4 hours. At this point the bark (outter layer of the meat) is set.
  • Remove from the smoker and place in a foil pan, cover tightly with aluminum foil, then place back on the smoker

Finish the Pork Butt

  • Continue cooking until the pork butt reaches an internal temperature of 206ºF, about 3 more hours
  • Remove from smoker, and remove aluminum foil to let the pork butt steam off for 15 minutes to prevent overcooking, and resets the bark

Resting and Pulling the Pork Butt

  • Cover the pork butt back up with foil, and let it rest for 1 hour or more
  • After resting 1 hour then pull/shred the pork butt
  • Optional: Strain the panned juice to remove chunks of fat, and then add the juice back to the meat for additional moisture and flavor

Serve Pulled Pork Sandwiches

  • Butter and toast the buns
    Pulled Pork Sandwiches
  • Add 6 – 8 oz of the pulled pork
  • Top with SuckleBusters Original BBQ Sauce
  • Serve and enjoy!

Smoked Mac and Cheese Bacon cups

Smoked Mac and Cheese Bacon Cups

Smoked Mac and Cheese Bacon cups
Print
5 from 1 vote

Smoked Mac-N-Cheese Bacon Cups

These are cheesy and loaded with bacon, take your Mac-n-Cheese game to a whole 'nuther level!
Prep Time30 minutes
Active Time1 hour 5 minutes
Course: Appetizer
Cuisine: American, BBQ
Keyword: Bacon, mac and cheese, Macaroni and cheese
Yield: 6 people
Cost: $10

Equipment

  • BBQ Grill
  • Foil Pan
  • Muffin tin

Materials

  • 12 each strips of bacon
  • 16 oz small pasta shells or elbow macaroni
  • 3/4 cup bread crumbs
  • 8 tbsp unsalted butter
  • 1/2 cup all-purpose flour
  • 5 1/2 cups milk
  • 2 cups smoked gouda cheese
  • 2 cups smoked cheddar cheese
  • 1 cup parmesan cheese
  • 1 cup mozzarela cheese
  • 1 tbsp SuckleBusters SPG BBQ Rub
  • 1 tbsp SuckleBusters Sugar Daddy BBQ Rub

Instructions

Make the Bacon Cups

  • Set the grill/smoker to 350 degrees cooking temperature
    Bacon cups
  • Place muffin tin face down on the counter (bottom side up), use 2 pieces of bacon per cup. Cut one strip in half and place it like an “X” over the cup. Wrap the second whole slice around the side of the cup, overlapping the ends. Repeat with remaining bacon strips until finished.
  • Sprinkle on SuckleBuster’s Sugar Daddy BBQ Rub
  • Place in the grill/smoker and cook for 45-55 minutes or until bacon is cooked thoroughly but not crisp
  • Remove from grill, let cool, and then carefully remove bacon cups from the pan

Make the Bread Crumb Topping

  • In a small mixing bowl stir 2 Tbsp melted butter, bread crumbs, and 1 tbsp SuckleBusters SPG All-Purpose Seasoning

Make the Cheese Sauce

  • In a saucepan, melt 6 tablespoons butter over medium heat. When butter melts, add flour. Whisk constantly for 1 minute
  • After one minute, slowly pour the milk into the flour/butter mixture while whisking. Continue cooking, whisking frequently, until the mixture bubbles and becomes thick
  • Remove the pan from heat and stir in all the cheeses. Set cheese sauce aside

Make the Macaroni

  • Fill a large saucepan with water and bring to a boil. Add pasta; cook a minute less than the manufacturer's directions. Remove from the heat, drain the water, and return to the pan.
  • Stir in the reserved cheese sauce until melted.

Assemble and bake the Mac Cups

  • Scoop the macaroni mixture into the bacon cups
  • Sprinkle bread crumb mixture on top
  • Place the loaded bacon cups in a foil pan
  • Bake uncovered in the grill/smoker until browned on top, about 30 minutes.
    Smoked Mac and Cheese Bacon cups

Remove, serve immediately and enjoy!

    Sugar Daddy Ham

    Sugar Daddy Ham

    Sugar Daddy smoked ham with peach glaze
    Prep Time30 minutes
    Cook Time2 hours
    Course: Main Course
    Cuisine: American, BBQ
    Keyword: Sliced ham, Smoked Ham
    Servings: 10 people
    Cost: $25

    Equipment

    • BBQ grill or smoker

    Ingredients

    • 8 – 10 Lb Cooked ham

    Peach Glaze

    Sugar Daddy Seasoning

    Instructions

    Peach Glaze

    • Whisk all ingredients together in a saucepan over medium heat until it reaches a soft boil.

    Sugar Daddy Seasoning

    • Combine all ingredients in a small mixing bowl until well blended.

    Cooking the Ham

    • Place the ham (large end down) on a wire rack in a shallow sided aluminum pan.
    • Brush on a generous amount of the Peach Glaze.
    • Next, cover the outside of the ham completely with the Sugar Daddy Seasoning.
    • Place the ham on a grill/smoker at 250 – 275 degrees cooking temperature. If using wood chunks or chips – select pecan or other fruit woods for a mild smoke flavor.
    • Reapply the BBQ Glaze every 15 – 30 minutes.
    • Cook the ham to an internal temperature of 140 degrees.
    • Cooking time can vary but it should be ready in approx. 2 – 3 hours. Do not over-cook or the ham will dry out, remember this is a pre-cooked ham, so you only need to warm it in order to cook the glaze and rub. When the ham is ready, the slices will start to separate slightly and the outside will have a crusty look.
    • Remove the ham from the grill and let it rest for a few minutes before slicing. Serve and enjoy!

    Texas Chili Recipe

    SuckleBusters Texas Chili

    Winner of Chile Peppers Magazine recipe two years in a row!
    Prep Time30 minutes
    Cook Time1 hour
    Course: Main Course
    Cuisine: American, BBQ
    Keyword: Chile, Chili, Texas Chili, Texas Red
    Servings: 6 people
    Cost: 10

    Equipment

    • Large Cooking Pot
    • Cutting Board

    Ingredients

    • 1 Lb ground beef (large chili grind recommended)
    • 1 Lb ground pork (or breakfast sausage)
    • 1 each yellow onion
    • 1 each green bell pepper
    • 1 each red bell pepper
    • 1 cup beef broth
    • 8 oz tomato sauce
    • 6 – 8 tbsp SuckleBusters Texas Chili Powder

    Instructions

    • Brown the chili meat and sausage in a large skillet. Drain and discard the excess drippings. Add the browned meat to a large dutch oven or 6-quart cooking pot.
      Brown the beef and pork
    • Finely chop the onion and bell peppers, add to the dutch oven, cook until translucent.
      Diced onion and peppers
    • Add the beef broth, tomato sauce and chili powder. Stir until all ingredients are combined.
      Add all ingredients and cook
    • Bring to a low boil, cover, then reduce temperature to a simmer for 1 hour, stirring often. Add water as needed and salt to taste. 
    • Remove from heat, serve in bowls top with chopped onions and shredded cheese. This recipe won 1st place in Chile Pepper Magazine Awards in 2013 & 2014. Enjoy!
      Serving the finished chili

    Video